SPF, DKIM and DMARC are DNS records that prove your emails really come from you. With them in place, your messages are far less likely to land in spam and it's harder for others to fake your address.
- SPF lists the servers allowed to send email for your domain.
- DKIM adds a digital signature to every email you send.
- DMARC tells receiving servers what to do with emails that fail those checks.
Step 1: Get your records from cPanel
- In cPanel, open Email → Email Deliverability.
- Next to your domain, click Manage.
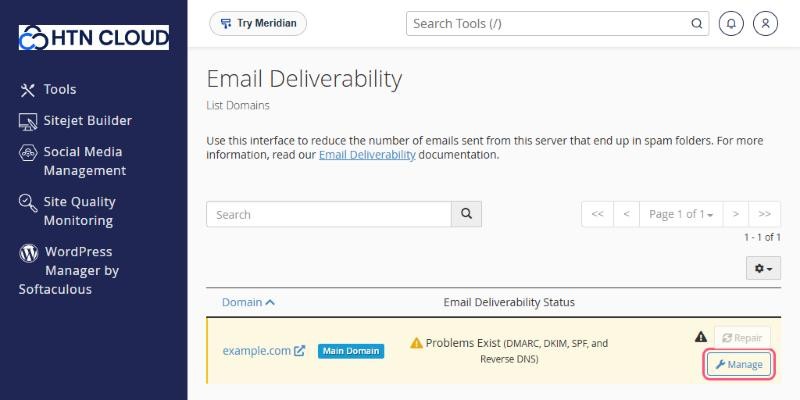
cPanel shows a suggested record for DKIM, SPF and DMARC. It also shows a warning that it doesn't control your DNS. That's expected, because your DNS is at your domain provider, so ignore the Install The Suggested Record buttons.
Step 2: Add them at your domain provider
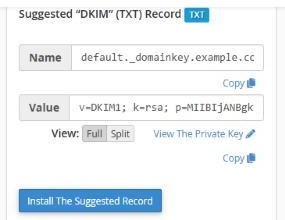
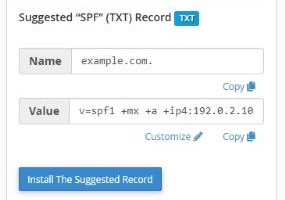
For each record, click Copy next to the Name and the Value, then create a TXT record at your domain provider with the same name and value.
| Record | Type | Name at your provider | Value |
|---|---|---|---|
| SPF | TXT | @ | e.g. v=spf1 +mx +a +ip4:192.0.2.10 ~all |
| DKIM | TXT | default._domainkey | the long value starting with v=DKIM1; k=rsa; p= |
| DMARC | TXT | _dmarc | v=DMARC1; p=none; |
default._domainkey.yourdomain.com. Most providers add your domain automatically, so enter only default._domainkey. For SPF, use @ (or leave the name empty, depending on your provider).Important
- Only one SPF record per domain. If you already have one, merge them. For example:
v=spf1 +mx +a +ip4:192.0.2.10 include:other-service.com ~all - Copy the DKIM value exactly, as one line with no spaces added. If your provider has a length limit, look for its option for long TXT records.
- Start DMARC with
p=none. Once everything works well you can make it stricter, for examplep=quarantine.
Step 3: Check
After a few hours, go back to Email Deliverability. When cPanel can see your new records, the DKIM and SPF sections show as valid.
Related: Troubleshooting: emails not sending, not arriving or going to spam