phpMyAdmin is a browser tool for working with your MySQL databases. Its most common uses are importing a database (for example when you move a website to HTN Cloud) and exporting one as a backup.
Open phpMyAdmin
In cPanel, open Databases → phpMyAdmin. Your databases are listed on the left. Click one to open it.
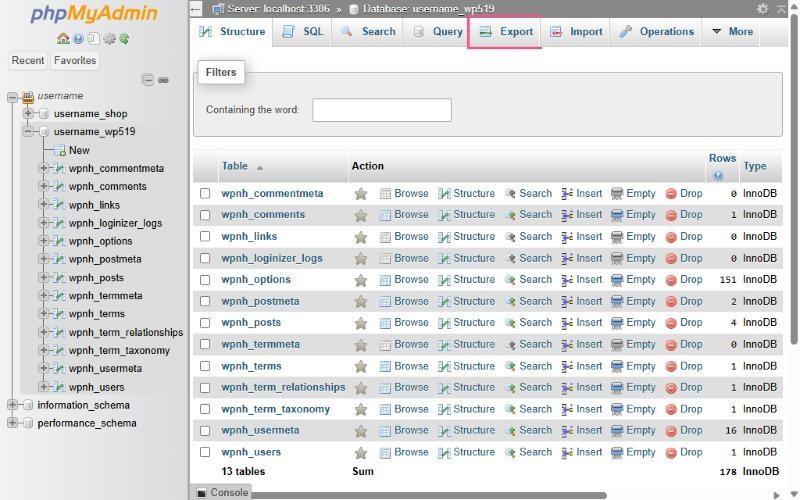
Export a database (backup)
- Click the database on the left.
- Click the Export tab.
- Leave Quick and format SQL selected and click Export (or Go).
- A
.sqlfile downloads to your computer.
Import a database
- First create an empty database and user. See How to create a MySQL database and user.
- In phpMyAdmin, click the new, empty database on the left.
- Click the Import tab.
- Click Choose File and select your
.sqlfile. It can also be compressed, for example.sql.gzor.zip. - Scroll down and click Import.
Large database? Compress the
.sql file as .gz or .zip before importing. It uploads much faster. If the file is still too big, raise the PHP upload limit (see How to change PHP settings (upload size, memory limit)) or open a support ticket.Common import errors
- "No database selected": click the database on the left before opening Import.
- "Access denied … CREATE DATABASE": your file tries to create a database. Remove the
CREATE DATABASEandUSElines from the start of the file, or export again without them. - "Table already exists": the database isn't empty. Drop the old tables first, or import into a new database.
Be careful with the Drop and Empty buttons in phpMyAdmin. They delete data immediately. Export a backup first.